---
availability: VALIDATED
logo: https://www.moveworks.com/content/dam/moveworksprogram/v2/logos/integration-logos/salesforce-integration-logo-primary.svg
name: Salesforce
---
# **Introduction**
**Salesforce** is a leader in cloud-based services, specializing in comprehensive customer relationship management (CRM) solutions, empowering businesses with data-driven decision-making.
This guide will step you through creating a connector within Agent Studio to make API calls to Salesforce's SOQL and sObjects APIs. The guide is now organized into **two main authentication sections**:
- [**OAuth 2.0 with Password Grant Flow**](https://marketplace.moveworks.com/connectors/salesforce#OAuth-2.0-with-password-grant-flow)
- [**OAuth 2.0 with Authorization Code (User Consent Auth) Setup**](https://marketplace.moveworks.com/connectors/salesforce#OAuth-2.0-with-Authorization-Code-(User-Consent-Auth)-Setup)
# **Prerequisites**
- Salesforce account with Admin privileges so we can create a new Connected App and manage User and Permissions
- [Install Postman](https://www.postman.com/downloads/) for testing the API connection
# **OAuth 2.0 with Password Grant Flow Setup**
To connect **Salesforce** to **Agent Studio** using **service-account-based authentication**, configure the **OAuth 2.0 with Username/Password (Password Grant) flow**.
This flow allows API access using a dedicated service account without requiring user interaction
## **Walkthrough**
Follow these steps to set up and validate your connection:
1. Set up the OAuth Password Grant Flow.
2. Test the connection using Postman.
3. Create a Connector in Agent Studio.
To connect to Salesforce from within Agent Studio, we are going to be using [OAuth2 with Username/Password](https://oauth.net/2/grant-types/password/). This requires the following:
- Consumer Key
- Consumer Secret
- Service Account Email
- Service Account Password
- Service Account Security Token
The following will walk you through how to set up a Connected App with a Service Account and necessary Permission Sets so we can set up the connector within Agent Studio.
## **Step 1:** Set up OAuth Password Grant Flow
1. **Create Connected App** in Salesforce
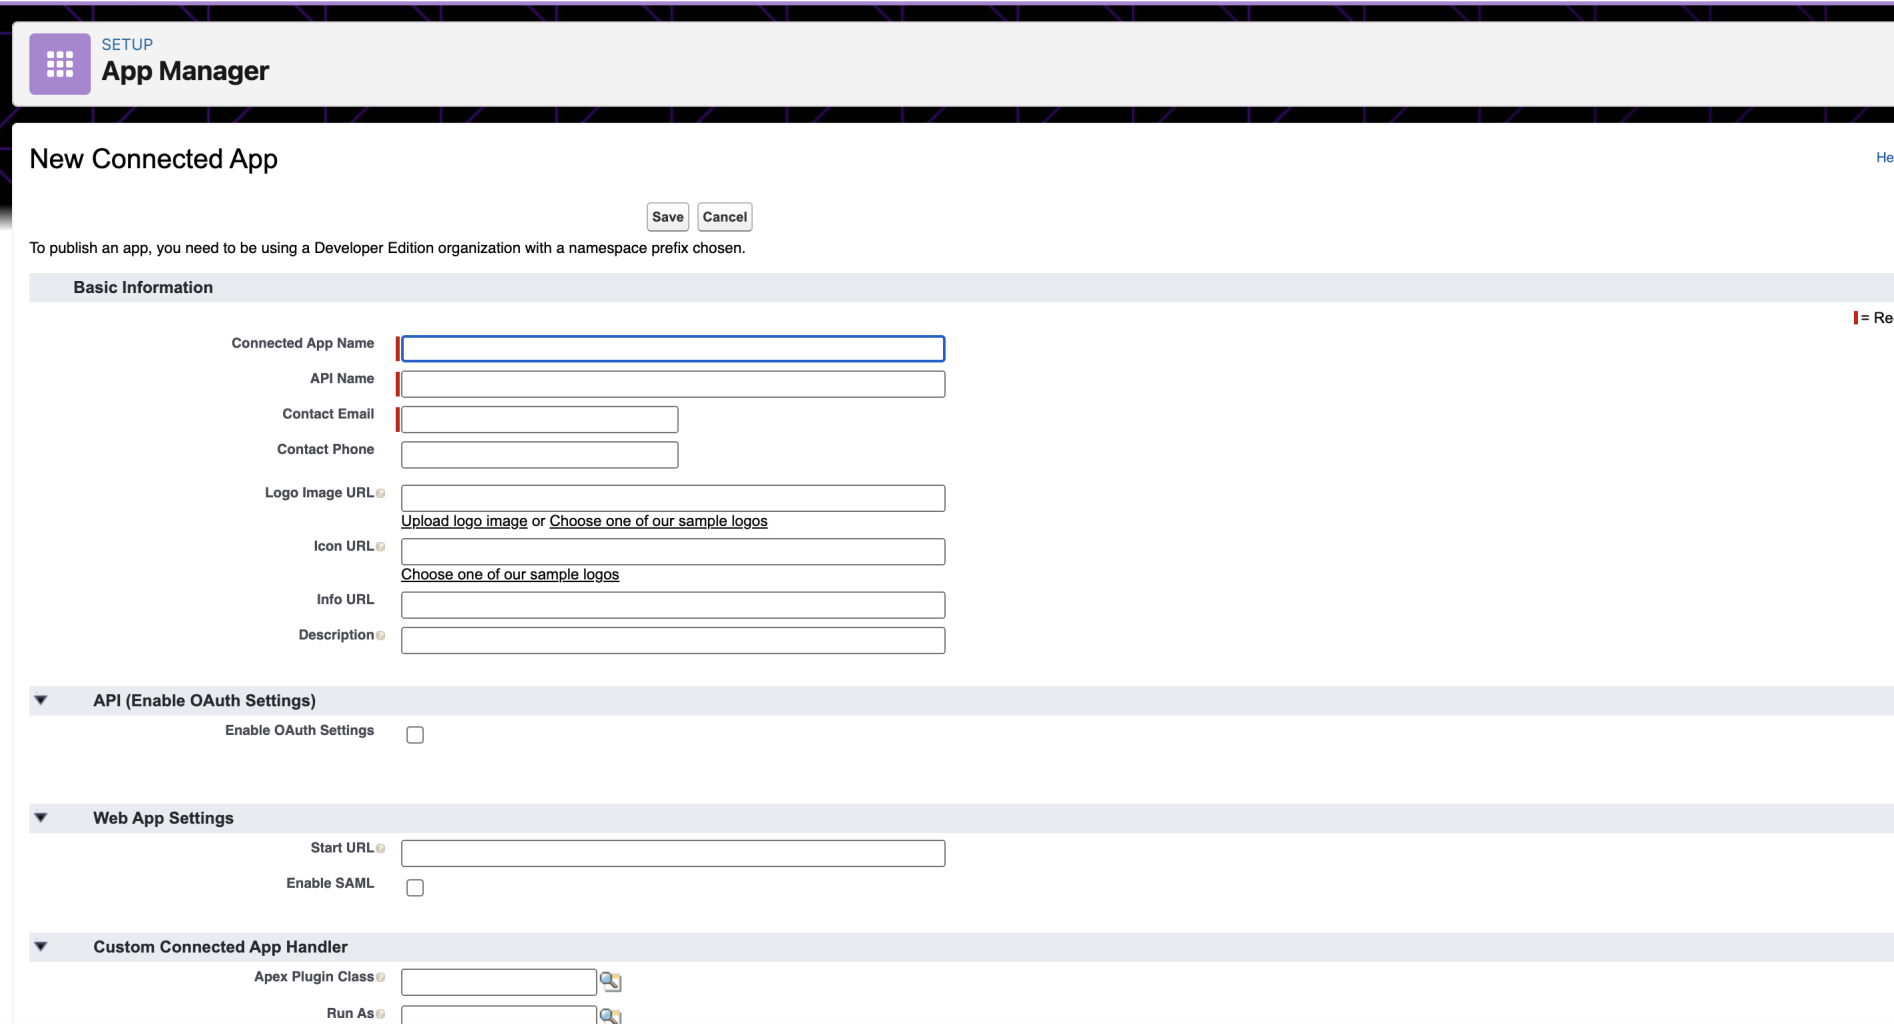
1. Under **Setup > App Manager** and click `New Connected App`
2. Fill basic info: {Connected App Name: `Moveworks_Server`, API Name: `Moveworks_Server`, Contact Email: [support@moveworks.ai](mailto:support@moveworks.ai)}
3. Select *enable oAuth settings* under API (Enable oAuth Settings) & add {Callback URL: [https://login.salesforce.com/](https://login.salesforce.com/)}
4. Add oAuth scopes to:
1. api
2. refresh_token, offline_access

5. Check the following:
1. **Enable Authorization Code and Credentials Flow**
2. **Require user credentials in the POST body for Authorization Code and Credentials Flow**

6. Click *`Save` > `Manage Consumer Details`(Under **API (Enable OAuth Settings)**)*
1. Note down the `Consumer Key` and the `Consumer Secret`
7. After saving, click *`Manage` > `Edit Policies`*
1. In the *OAuth policies* section, change to *Permitted Users* to *Admin approved users are pre-authorized*
2. In the Session policies section, change *Timeout Value* to *24 hours*
3. Click *Save*
2. **Create a Permission Set** to interact with the Connected App
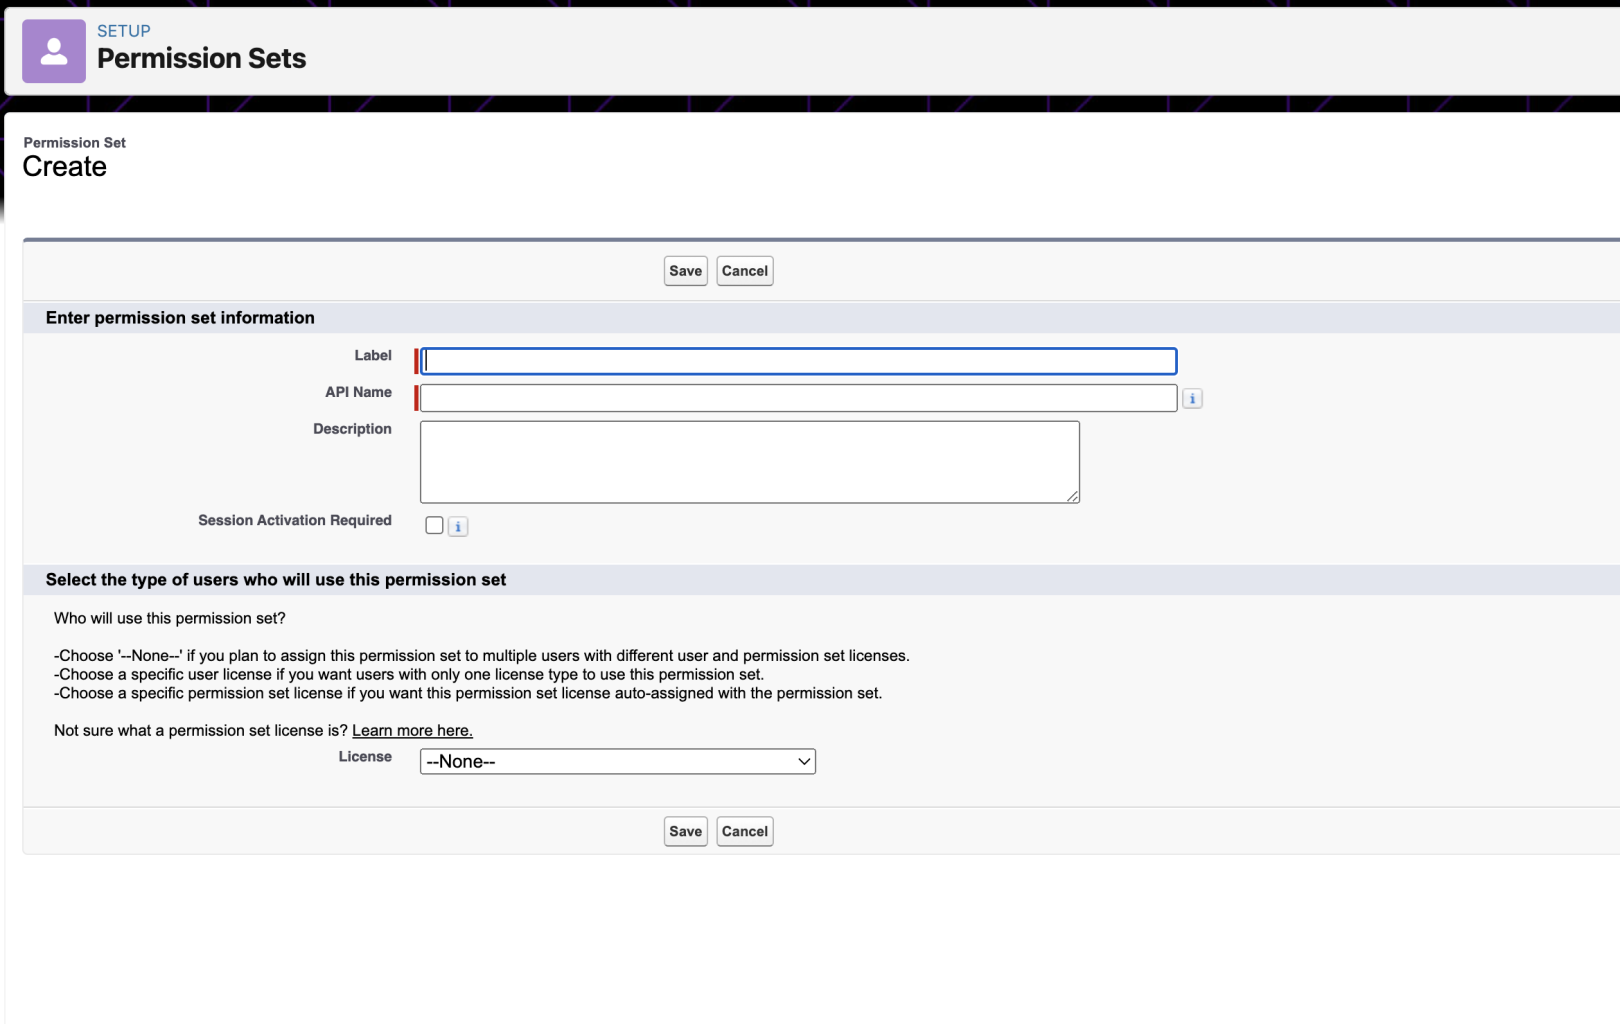
1. Navigate to **Users > Permission Sets** and click on `New`
2. Add `moveworks_connected_app` as the Label & Api Names & click Save
3. Now click on the `moveworks_connected_app` Permission Set and click Assigned Connected Apps
4. Click Edit and add `Moveworks_Server` to list of Enabled Connected Apps & click Save
3. Create **New Service Account** (if it doesn’t exist)
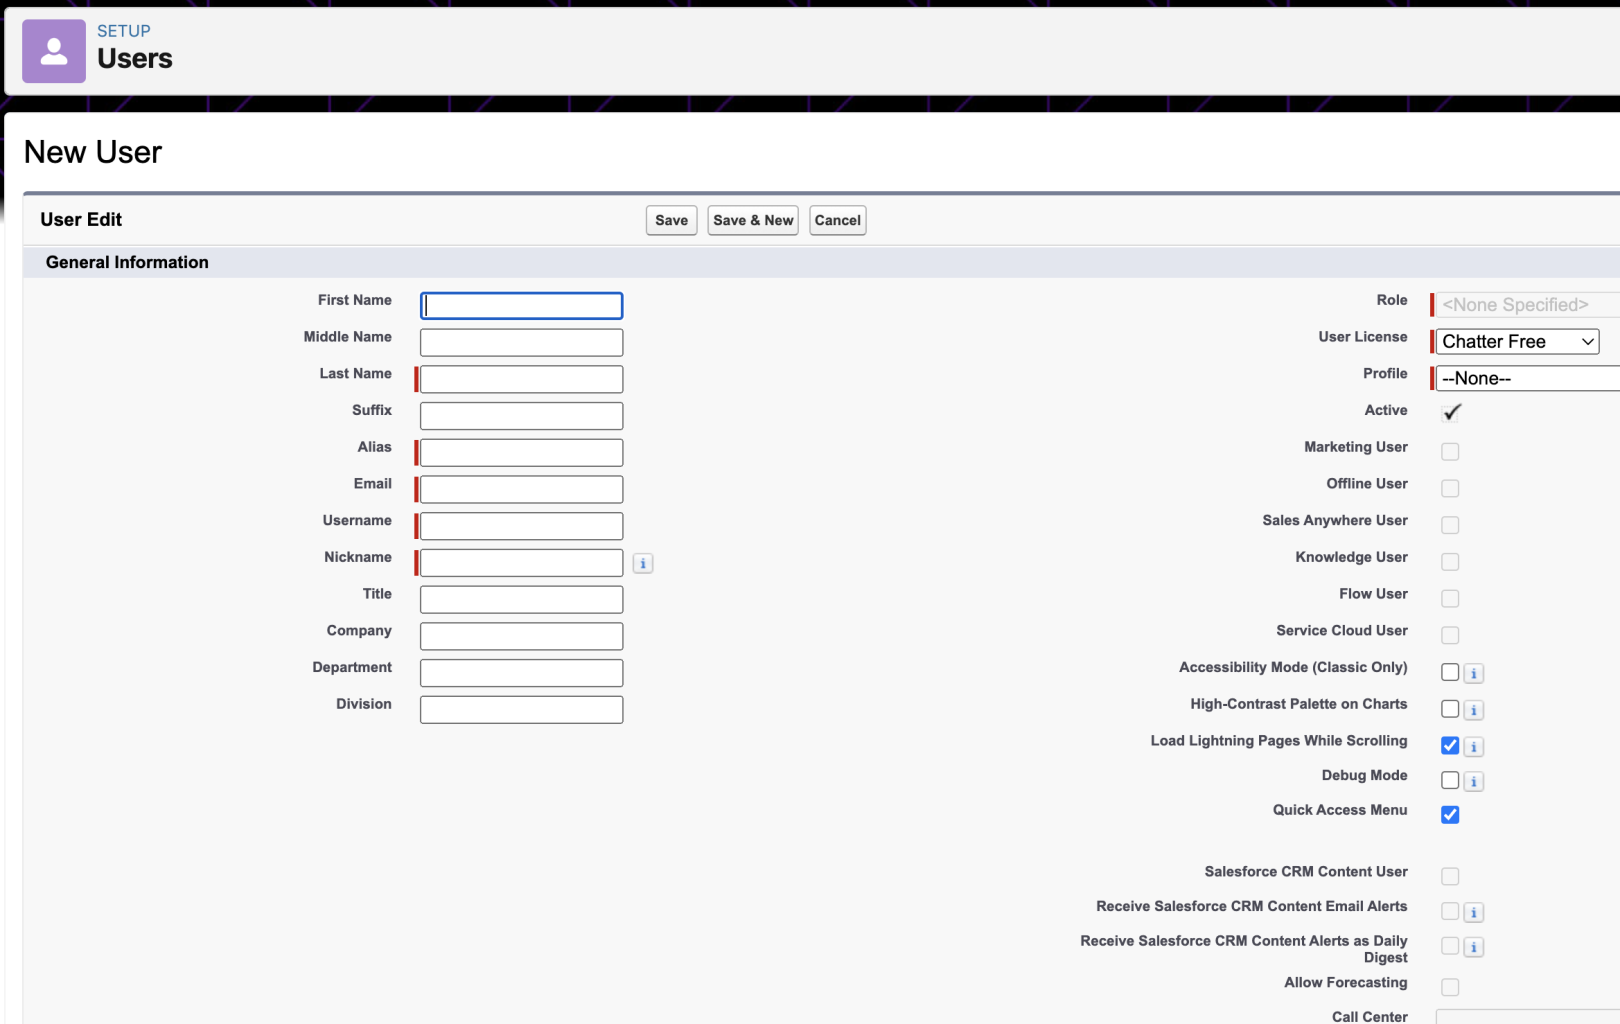
1. Navigate to **Users > Users** and click on `New User`
2. Enter the following information & click *Save*:
1. Last Name: `Moveworks`
2. Alias: `moveworks`
3. Email, Username & Nickname: `moveworks@{{customer-domain}}.com`. Please also create and enable the Email on your Mailing system because you will receive emails for the 5th step mentioned below.
4. Setup role as `Admin` (or any custom role that you have which allows access to view or modify certain objects)
5. Setup profile as `Salesforce Admin` (or any custom profile that you have which allows access to view or modify certain objects)
4. **Assign our service user the connected app**
1. Navigate to **Users > Users** & click on our service user account that was just created.
2. Click on **Permission Set Assignment** and then **Edit Assignments**
3. Now add `moveworks_connected_app` to list of **Enabled Permission Sets** & click **Save**
5. **Get the Username, Password and the Security Token for the Service User**
1. Navigate to **Users > Users** & click on *Login* for service user account that was just created.
2. After logging in as the service user account, click on *`View Profile` > `Settings`*
1. Go to ***Change My Password*** and set up a new password for the account. Note down the password after saving it.
2. Go to ***Reset My Security Token*** and click on `Reset Security Token` button. You will receive an email with the new security token. Note down the security token too.
>Note: If you are unable to see the Reset Security Token option, follow [these steps](https://help.salesforce.com/s/articleView?id=000386179&type=1).
## **Step 2: Test with Postman**
Once you have all the required credentials from the above process, please move on to test the OAuth API and try to fetch the token.
1. [Salesforce OAuth Authentication API](https://help.salesforce.com/s/articleView?id=sf.remoteaccess_oauth_endpoints.htm&type=5): An API for Salesforce Connected Apps to request an OAuth token required to authenticate API calls
```bash
curl --location 'https://login.salesforce.com/services/oauth2/token' \
--header 'Accept: application/json' \
--header 'Content-Type: application/x-www-form-urlencoded' \
--data-urlencode 'grant_type=password' \
--data-urlencode 'client_id={{salesforce_consumer_key}}’ \
--data-urlencode 'client_secret={{salesforce_consumer_secret}}' \
--data-urlencode 'username={{salesforce_username}}' \
--data-urlencode 'password={{salesforce_password}}{{salesforce_security_token}}' \
--data-urlencode 'redirect_uri=https://login.salesforce.com/'
```
> The API URL used here is `https://login.salesforce.com` which signifies a Production instance of Salesforce. If you are using a Sandbox instance, please modify the `URL` to the following:
`https://test.salesforce.com`
>
2. Import this request into Postman, replace the credentials and execute it. You should get a successful response and a token.

## **Step 3: Integrate with Agent Studio**
1. In Agent Studio, create a new connector with the following configuration (please name it accordingly to identify while creating use cases):
- Description: `Connect to Salesforce SOQL APIs`
- Base URL: `https://{your-salesforce-domain}.my.salesforce.com`
- Auth Config: `Oauth2`
- Oauth2 Grant Type: `Password Grant`
- Client ID: `{{salesforce_consumer_key}}`
- Client Secret: `{{salesforce_consumer_secret}}`
- Password Grant Username: `{{salesforce_username}}`
- Password Grant Password: `{{salesforce_password}}{{salesforce_security_token}}`
- Oauth2 Token Url: `https://login.salesforce.com/services/oauth2/token` (Or, `https://test.salesforce.com/services/oauth2/token` if you’re configuring for a Sandbox instance)
Click on `Save` to submit the credentials and your connector will be ready.
2. Add your API details. You can read more about setting up API actions from our [API configuration reference](https://developer.moveworks.com/creator-studio/integrations/outbound/api-configuration/).
```bash
curl --location 'https://{{your-salesforce-instance}}.my.salesforce.com/services/data/v58.0/query?q=SELECT%20Name%20FROM%20Contact%20LIMIT%2010' \
--header 'Authorization: Bearer {{generated_bearer_token}}'
```
- API endpoint Path: `/services/data/v58.0/query`
- Method: `GET`
- Query Parameters
| Key | Value |
| --- | --- |
| q | SELECT Name FROM Contact LIMIT 10 |
3. Test your setup in Agent Studio and look for a successful execution.

# **Congratulations!**
You've successfully integrated Salesforce’s API with Agent Studio. This opens up a variety of automation and integration possibilities within your Salesforce instance.
# **OAuth 2.0 with Authorization Code (User Consent Auth) Setup**
To connect **Salesforce** to **Agent Studio** using **user-consent-based authentication**, configure the **OAuth 2.0 with Authorization Code** flow.
This ensures Salesforce users explicitly authorize Moveworks before any API actions are performed on their behalf.
## **Walkthrough**
Follow these steps to set up and validate your connection:
1. Log in to Salesforce Setup
2. Create a New Connected App
3. Retrieve Client ID and Client Secret
4. Integrate with Agent Studio
5. Test the Connector in Agent Studio
## Step 1: Log in to Salesforce Setup
- Go to the Salesforce login page and sign in with your admin credentials.

- Click the Gear icon in the top-right corner and select Setup

- From Setup, search for **Apps** in the Home page search bar, then go to:
- **Apps→ External Client Apps → Settings**

## Step 2: Create a New Connected App
- Click New Connected App. Enable “Allow creation of connected apps”

- **Connected App Name:** `{{CONNECTED_APP_NAME}}`
- **API Name:** `{{API_NAME}}`
- **Contact Email:** `{{CONTACT_EMAIL}}`
- This email is used by Salesforce to communicate about the Connected App, including notifications about OAuth issues, security updates, or app usage alerts.
- Use a monitored admin or integration owner email (e.g., integration-team@yourcompany.com).
- **Enable OAuth Settings:** Check **Enable OAuth Settings**
- **Callback URL:** `{{CALLBACK_URL}}`
- The Callback URL is where Salesforce sends the OAuth authorization code after a user authorizes the app.
- Ensure it matches your tenant/org configuration. For example:
```bash
https://<org-tenant-name>.moveworks.com/auth/oauthCallback
```
- Replace <org-tenant-name> with your actual org/tenant name.
- The URL must exactly match the one registered in Salesforce to avoid OAuth redirect errors.
- Select the required scopes by moving them from Available OAuth Scopes to Selected OAuth Scopes using the right-arrow icon:
- `Manage user data via APIs (api)`: Allows the app to read and update user data through Salesforce REST, SOAP, and Bulk APIs.
- `Perform requests at any time (refresh_token, offline_access)`: Provides refresh tokens so the app can stay authenticated and make API calls even when the user is not actively logged in
- `Access unique user identifiers (openid)`: Required to retrieve basic identity information for the authenticated Salesforce user, including a stable user ID for clean identity mapping
- Note: Add more scopes depending on your integration needs.
- Examples:
- **`Access the identity URL service (id, profile, email, address, phone):`**: Provides access to the Salesforce Identity Service, allowing the app to retrieve a user’s identity details (such as name, email, profile info, address, and phone) from the Identity URL.

For this connector, the following options need to be disabled to support the Authorization Code Grant flow:
- Require Proof Key for Code Exchange (PKCE) – Disabled to allow this flow.
- Require Secret for Web Server Flow – Disabled if the integration cannot safely store a client secret.
- Require Secret for Refresh Token Flow – Disabled only if your integration cannot safely store a client secret
Note: Disabling these options is specific to this connector setup. For general Salesforce OAuth 2.0 guidance, see [Salesforce Authorization Code Flow documentation](https://help.salesforce.com/s/articleView?id=sf.remoteaccess_authenticate.htm&type=5)
- Click **Save** to continue.

- After clicking **Save**, click **Continue**

- The Connected App will then be successfully saved.

## Step 3: Retrieve Client ID and Client Secret
- In the **Connected App** detail page, click **Manage Consumer Details**.

- Copy the **Consumer Key** (Client ID) and **Consumer Secret** (Client Secret).

- Store these credentials securely, as they will be used for **Agent Studio** integration.
## Step 4: Integrate with Agent Studio
- In **Agent Studio**, create a new connector with the following configuration:
- **Connector Name:** `{{Connector_Name}}`
- **Display Name:** `{{Display_Name}}`
- **Display Description:** This connector enables secure, user-authorized access to Salesforce APIs using OAuth2 Authorization Code Grant.
- **Base URL:** `https://{SALESFORCE_BASE_URL}`
- **Auth Config:** OAuth2
- **OAuth2 Grant Type:** Authorization Code Grant
- **Authorization URL:** `https://{SALESFORCE_AUTH_DOMAIN}/authorize`
- **Client ID:** `{{CLIENT_ID}}`
- **Client Secret:** `{{CLIENT_SECRET}}`
- **Authorization Code Grant Scope:** `api refresh_token offline_access`
- **Authorization Request Query Parameters:**
- `response_type`: `code`
- `prompt` : `consent`
- **OAuth2 Token URL:** `{{Token_URL}}`
- **OAuth2 Client Authentication:** OAuth 2.0 with Request Body
- **OAuth2 Custom OAuth Response Type:** JSON
- **Header Auth Key:** `Authorization`
- **Header Auth Value Pattern:** `Bearer %s`
- **Custom Grant Type:** `authorization_code`
- **Additional Headers:** `Content-Type: application/json`
Once all fields are completed, click **Save** to create and store your connector configuration.
## Step 4: Test the Connector in Agent Studio
Set up your API. You can read more about configuring and testing API actions from our **API Configuration Reference**.
Use the following API to verify that the **User Consent Authentication (UCA)** setup for **Salesforce** is functioning correctly.
This call helps confirm that authentication is working as expected and that the data is being fetched at the **user level only** — based on the logged-in user’s access permissions in **Salesforce**.
**1. Verify UCA Setup Using Salesforce User Info API**
- Use this API call to ensure that OAuth and UCA authentication are functioning correctly:
```bash
curl --location 'https://<YOUR_INSTANCE_DOMAIN>/services/oauth2/userinfo' \
--header 'Accept: application/json' \
--header 'Authorization: Bearer {{ACCESS_TOKEN}}'
```
**API Endpoint Path:**
`/services/oauth2/userinfo`
**Method:**
`GET`
**Headers:**
- `Accept`: `application/json`
This confirms that the connector is authenticated and returning information for the logged-in Salesforce user only.
**2. Test the Connector with a Standard Salesforce Object**
- Query the Account object to confirm that UCA is working correctly and that data is returned according to the user’s access permissions
```bash
curl --location 'https://<YOUR_INSTANCE_DOMAIN>/services/data/vXX.0/query/?q=SELECT+Id,+Name,+Industry,+Type+FROM+Account' \
--header 'Accept: application/json' \
--header 'Authorization: Bearer {{ACCESS_TOKEN}}'
```
**API Endpoint Path:**
`/services/data/vXX.0/query`
**Query Parameter:**
`q=SELECT Id, Name, Industry, Type FROM Account`
**Method:**
`GET`
**Headers:**
- `Accept`: `application/json`
This returns all Accounts the logged-in user has permission to access, confirming that the connector is authenticated properly and that Salesforce data is being retrieved based on the user’s own access level only.
**Your Instance Configuration**
All Salesforce API endpoints in this plugin use `{{YOUR_INSTANCE_DOMAIN}}` as a placeholder.
Follow the steps below to update it correctly after installation:
1. Go to your **Salesforce Setup**.
2. In the **Quick Find** box, search for **My Domain** and select it.
3. Locate your **Salesforce org’s My Domain URL** (e.g., `yourcompany.my.salesforce.com`).
4. Replace `{{YOUR_INSTANCE_DOMAIN}}` with your actual My Domain URL in all **action definitions** within the connector.
5. Ensure all API requests use **HTTPS** and leverage **OAuth 2.0 authentication**.
6. Save your configuration to ensure that all API requests are routed correctly and securely to your Salesforce instance
### **Test Your Setup:**
1. In **Agent Studio**, create and run a new **Action**.
2. Import the above **cURL command**.
3. Add the **Salesforce User Consent Auth Connector**.
4. Click **Test → Generate New Access Token**.
- Ensure you are acting on behalf of the **intended Salesforce user** before generating the token.
- The returned data will reflect only what that user has permission to access in **Salesforce**.

### **Establish a Connection Between Your UCA Connector and Agent Studio**
- Integrate your **UCA Connector** with **Agent Studio**.

- Next, you will be redirected to the **Salesforce login page**.

- If you log in as an **admin**, you’ll have access to all data, while a **regular user** will only see data they have permissions for.
- After logging in successfully, click **Allow** to generate the **authorization code**.

- Once you click **Allow**, you will receive a notification from the **Moveworks bot** confirming that it has access to perform actions on your behalf.

### **Verify UCA Functionality**
- Click **Test** to verify that **User Consent Authentication (UCA)** is working correctly.
- The action should call the /services/oauth2/userinfo endpoint with the logged-in user’s token, returning only the data that user is allowed to access — confirming **user-specific consent and permissions**.

- The action should call the /services/data/v62.0/query/?q=SELECT+Id,+Name+FROM+Account+WHERE+OwnerId='me' endpoint with the logged-in user’s token, returning only the Accounts that the user owns or is authorized to view — confirming **user-specific access and permissions**.

# **Congratulations!**
You’ve successfully integrated **Salesforce** with **Agent Studio** using **OAuth 2.0 (User Consent Auth)**, enabling secure user-level authentication and access to Salesforce data based on user consent within your Salesforce instance.